Author Topic: Madaguy 1955 Nomad Build  (Read 16726 times)

ryeguy2006a

  • Oracle Forum Member
  • *
  • Posts: 6040
Re: Madaguy 1955 Nomad Build
« Reply #80 on: May 22, 2023, 08:31:31 AM »
I wanted to see how the pass through panels that I made fit with the outer wheel houses, and I'm happy that they were 95% great. The hole that I used was a tad higher than it should have been so I need to open up the bottom of the hole and it will not contact the cable at all. It held the front outer wheel house exactly where it needed to be so that is fantastic. I need to scrape off that under coating from the inner wheel house...


Glad those parts are fitting right. I need to replace the old seals with the new ones, and then I can do a final mock up before welding.

Next up was something I had been dreading... removing the driver's side window's to repair the rusty window channel. The good news is that most of the screws came right out and only fought with two stubborn screws.


I could have just forgot that I saw these large rust holes, but I couldn't let it go.


The outer window trim requires that you remove the windows before you can remove the trim. Most of the screws came out easy with some PB Blaster and my impact drill, but the last two were too rusty. I was trying to drill the head of the one screw to just remove the trim then worry about the screw later, then my bit broke...


I was mad at first, but then realized that 1) it builds character/patina, and 2) the paint job is a solid 15 footer so it's not that big of a deal. I walked away and then came back and decided to try the old weld a nut to the top trick and I won with no damage to the trim.


Once the trim was off I realized that the trim has never been off of the car since it was new! It was a little more crusty than I would have liked, but I'll treat the rust with something before the trim goes back on. It was also really cool to see the original paint for the car. My trim tag is missing so I didn't know for sure what the color was, but now I'm confident it was Ivory top, but not sure what shade of green that is. I think there were three that year.


Here's the bad spot.


I cut it out right at the corner so that I could retain as much of the original metal as I could and keep some of the intricate shapes in the metal.


A metal brake would come in really handy during this stage, but instead I'm working with what I have. A 1/2" plate of steel, vice grips, and a hammer. Turned out pretty good and I got the width of the channel spot on. Mocked it up several times to get the angles right and the fitment spot on.


I bought this really cool tool for filling in spot weld holes that worked great for a few of those large pits. Highly recommend this tool, it worked great.


I installed the inner wheel well for the first bit of welding so that I knew that it was in the right position and no surprises later. Ground with a flap disk and I was very pleased with that repair.


Next up was a repairing this flange. There was a small triangular section missing from the flange. Quick little patch and it was good as new and hit it with some weld through primer.


Next was making an upper and lower patch for the wheel inner well. I used the new floor pan flange as a template for where the lower inner wheel well patch needed to be. Got busy working and didn't take pictures, but here's the final product.


I didn't get a picture of it, but I found the last piece of new metal that I needed to buy which was the gas tank brace. I found someone selling on eBay for almost $80 off, which was perfect timing for me. I also found a guy selling a Gen 6 cooling fan off of a 2017 SS Camaro for really cheap on a FB group. These fans are bad to the bone, 19" SPAL fan with an 850 Watt motor that is controlled by PWM. I think I saw somewhere that they are rated around 4k cfm. Best part is they are nearly a direct fit on a stock tri-five radiator support!


Now that my window channel, floor pan flange and inner wheel house are both repaired, they are ready to install for good. I just need to drill some holes for spot welds, spray weld through primer and final weld the panels. Very exciting to get to this stage. I think once I get the driver's side wheel well all welded and back together, I may pull off the passenger's side windows and trim to treat that side as well. I'm this far I might as well. Plus I won't have to worry about hurting the windows with weld spatter.

Cheers,
Ryan

1976 Trans Am LS1 and much more...SOLD
1968 Camaro LSA, T56 Magnum, and much more...SOLD

Current Project: 1955 Nomad LC9, 4L80e, C5 brakes and etc...

MNBob

  • Oracle Forum Member
  • *
  • Posts: 2018
Re: Madaguy 1955 Nomad Build
« Reply #81 on: May 22, 2023, 05:02:52 PM »
Amazing work Ryan!  A 4000 cfm fan with PWM controller is a great find and gives options for the engine locate.
1979 TATA Extreme TKO .64
Hedman elite; Pypes 2.5; Borla XS; MSD 6A; Performer intake; open scoop; Sniper QJ;  110 Amp Alt; 4 core radiator/Mark VIII fan; RobbMc mini starter; subframe connectors; solid body mounts; fiberglass rear springs; poly sway bar and link bushings; 81 master; D52’s; Blazer disks; 225/60 & 235/60 17's TrueContact's; relays for PW, PDL, lights; keyless entry

kentucky yeti

  • Jedi Council
  • Oracle Forum Member
  • *
  • Posts: 13363
  • located in western Ky
Re: Madaguy 1955 Nomad Build
« Reply #82 on: May 24, 2023, 06:32:54 AM »
I've said it before, but it is worth repeating- your fab skills are outstanding!
Mike (aka Yeti)

1977 Y82 W72 Auto
2015 F-150 Lariat 4x4 (twin turbo)
2016 Explorer Limited
2012 Mustang

ryeguy2006a

  • Oracle Forum Member
  • *
  • Posts: 6040
Re: Madaguy 1955 Nomad Build
« Reply #83 on: May 24, 2023, 06:41:36 AM »
Thanks guys! I'm telling myself to push through the metal work so that I can get to the work that I find more fun; Mechanical, electrical and plumbing!  :lol:

1976 Trans Am LS1 and much more...SOLD
1968 Camaro LSA, T56 Magnum, and much more...SOLD

Current Project: 1955 Nomad LC9, 4L80e, C5 brakes and etc...

roadking77

  • Oracle Forum Member
  • *
  • Posts: 13245
Re: Madaguy 1955 Nomad Build
« Reply #84 on: May 25, 2023, 05:45:57 AM »
I enjoy that kind of metal work but it does seem to get tedious after a while. I wish you were closer, I could do the metal and body work while you concentrate on the drive train. Get yours done then could start on mine, LOL.
Finished!
77 T/A - I will Call this one DONE!
79 TATA 4sp-Next Project?
79 TATA - Lost to Fire!
86 Grand Prix - Sold
85 T/A - Sold
85 Fiero - Sold
82 Firebird - Sold
'38-CZ 250
'39-BSA Gold Star
'49-Triumph 350
'52-Ariel Red Hunter
'66-BSA Lightning
'01-HD RoadKing

Re: Madaguy 1955 Nomad Build
« Reply #84 on: May 25, 2023, 05:45:57 AM »

5th T/A

  • Oracle Forum Member
  • *
  • Posts: 1394
Re: Madaguy 1955 Nomad Build
« Reply #85 on: May 25, 2023, 07:17:56 AM »
Ryan, nice progress. Like others have said I am amazed at your ability and ambition!
1980 T/A with a Pontiac 461

Gone but not forgotten;
1973 T/A 455
1975 T/A 400
1978 T/A W72
1982 T/A cross fire injected

Two wheel toys;
2014 Harley Ultra Classic Limited
2013 Honda CB1100
2010 Yamaha Vmax
1982 Yamaha Seca 750

ryeguy2006a

  • Oracle Forum Member
  • *
  • Posts: 6040
Re: Madaguy 1955 Nomad Build
« Reply #86 on: May 30, 2023, 01:47:32 PM »
I enjoy that kind of metal work but it does seem to get tedious after a while. I wish you were closer, I could do the metal and body work while you concentrate on the drive train. Get yours done then could start on mine, LOL.

If you were closer Kerry, I'd totally take you up on that offer!

1976 Trans Am LS1 and much more...SOLD
1968 Camaro LSA, T56 Magnum, and much more...SOLD

Current Project: 1955 Nomad LC9, 4L80e, C5 brakes and etc...

ryeguy2006a

  • Oracle Forum Member
  • *
  • Posts: 6040
Re: Madaguy 1955 Nomad Build
« Reply #87 on: May 30, 2023, 01:48:34 PM »
Thanks 5th T/A! The comments help keep me motivated!

Here's the last piece that I needed to buy for my sheet metal adventures. It's the rear gas tank brace. I could have re-used the original one, but it would have been a shame to put an old rusty one in place with the new sheet metal.


Coated the inside with weld through primer.


Next job was to get the passenger side floor pan flange repaired so that I can attach it to the wheel well. I decided to make this in two pieces to save myself a bunch of time with the shrinker/stretcher. I started with a cardboard template to get the curvature right for the floor piece, then transferred it to sheet metal for a final fitment. Once I was happy with that fitment, I laid down some painters tape to get the right curvature for the flange piece.


Carefully pealed off the tape and transferred it to sheet metal. I always make my templates as accurate as I can, and cut my metal slightly larger to account for any variations.


Once I had my two pieces I got it all back together to start tacking it together for final welding. I would tack, trim, grind, and fit multiple times. I noticed at the top of the floor pan flange on the driver's side that there was a triangular indentation, so I did my best to replicate that.


I'm very happy with how the final piece turned out, and glad that it fits really nicely as well.


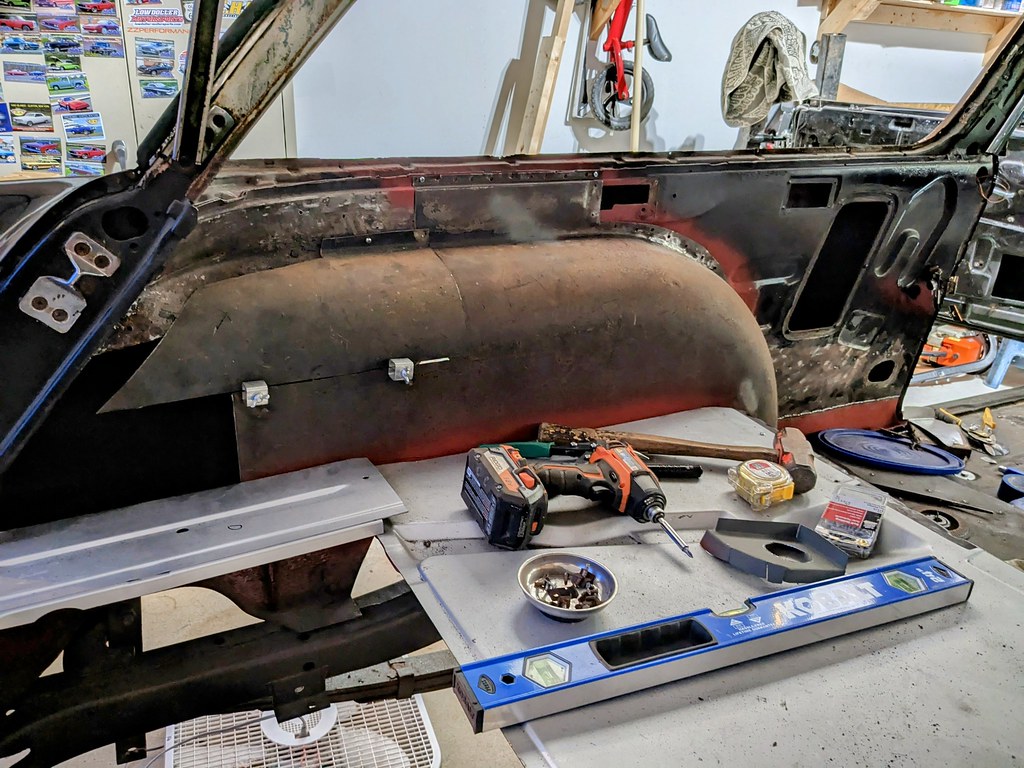
Driver's side wheel well is all ready for welding now. I also took one of the rear pieces that I had left over to see how the fitment was and looks like it will need a small filler panel, but otherwise fits very nice with the curve at the back.


Then my family and I decided to go up to NY to visit family, and brought some parts for my father-in-law to work on since he's been itching to work on my car ever since I got it. Figured it would be a great project to fit up the center cross brace and shock re-enforcement plates. Brought the weld through primer, and we got to work.


We got the whole family involved! My wife, brother in law, sister in law and father in law all got to try out some spot welds on the panels. We dialed in the welder before hand, and gave them all some pieces to practice on and they all did surprisingly well. Cool that we all have a part in it now.

My wife getting some instruction from her Dad. Yes, before the comments come those are OSHA approved Birkenstocks.


The final piece turned out really great with a tight fitment just like I wanted.


I was also able to borrow a tool from my grandpa that I didn't even realize that he had. I've been wanting a metal brake for a long time and this one is perfect as it bolts to the bench top and is 36" wide. I needed to build a zig zag piece for where the inner wheel well meets the tailgate opening. This was just the ticket, and worked great after several test pieces. They were actually much harder to make than they appear.


It worked out great because my FIL got to use his new garage. He's just finalized everything on it and is on the hunt for a new project, so he got to use a lot of his new tools and I got a lot of progress done on my car. Everyone wins!

We were only there from Friday through Sunday, so when we got back yesterday when everyone was napping, I got my TIG welder all set up to try for the first time with all the right gas and equipment. I sharpened up my tungsten and had a full tank of 100% Argon. I tried a few spot welds at first to practice my initiations, then a few straight lines with no filler to get a feel for the torch. After I felt more comfortable, I started doing some straight lines with adding filler rod. Definitely a learning curve, but actually not as bad as I had made it out to be in my mind. Here's the best one that I was able to lay down this go around. It looks good to me other than the small divots? Any feedback would be greatly appreciated! 


After I felt pretty confident with the coupons that I had, I attempted to go live action with my outer wheel house. I had a nice tight fit up and this run only took a small amount of filler at the end.


These were my settings. I watched several youtube videos on what people are running for settings and this was just what I came up with based on several that I watched. Again, feel free to critique.


Cheers,
Ryan

1976 Trans Am LS1 and much more...SOLD
1968 Camaro LSA, T56 Magnum, and much more...SOLD

Current Project: 1955 Nomad LC9, 4L80e, C5 brakes and etc...

roadking77

  • Oracle Forum Member
  • *
  • Posts: 13245
Re: Madaguy 1955 Nomad Build
« Reply #88 on: May 30, 2023, 02:26:08 PM »
Nice work. I havent tried TIG yet but would like to. Nice to get the family involved. Hoped the kids were able to see the big rock unloaded, LOL.
Finished!
77 T/A - I will Call this one DONE!
79 TATA 4sp-Next Project?
79 TATA - Lost to Fire!
86 Grand Prix - Sold
85 T/A - Sold
85 Fiero - Sold
82 Firebird - Sold
'38-CZ 250
'39-BSA Gold Star
'49-Triumph 350
'52-Ariel Red Hunter
'66-BSA Lightning
'01-HD RoadKing

MNBob

  • Oracle Forum Member
  • *
  • Posts: 2018
Re: Madaguy 1955 Nomad Build
« Reply #89 on: May 30, 2023, 04:33:26 PM »
That TIG weld is awesome.  If you can do that, that is all you need.  I too, would like to learn.
« Last Edit: May 31, 2023, 12:44:56 PM by MNBob »
1979 TATA Extreme TKO .64
Hedman elite; Pypes 2.5; Borla XS; MSD 6A; Performer intake; open scoop; Sniper QJ;  110 Amp Alt; 4 core radiator/Mark VIII fan; RobbMc mini starter; subframe connectors; solid body mounts; fiberglass rear springs; poly sway bar and link bushings; 81 master; D52’s; Blazer disks; 225/60 & 235/60 17's TrueContact's; relays for PW, PDL, lights; keyless entry

FormTA

  • Oracle Forum Member
  • *
  • Posts: 5574
  • Life is short, have fun, Drive a T/A
Re: Madaguy 1955 Nomad Build
« Reply #90 on: May 30, 2023, 06:53:13 PM »
Glad to see you picked up a TIG. I use mine all the time but I haven't for sheet metal yet. I just picked up an English wheel so I know I will need to start tig welding panels if I want to wheel them.

Weeds look great as does everything ho have done! Keep it up!
79 Trans am low buck LS swapped
79 Formula 301 (Work in progress)
67 RS Camaro (waiting it's turn)
69 Dodge charger on late model charger chassis
49 Ford F1 on a 2003 Chevy ZR2 Chassis (current project)
Names, Luke. If I hear anyone telling me they're my father....

ryeguy2006a

  • Oracle Forum Member
  • *
  • Posts: 6040
Re: Madaguy 1955 Nomad Build
« Reply #91 on: May 31, 2023, 06:47:09 AM »
Nice work. I havent tried TIG yet but would like to. Nice to get the family involved. Hoped the kids were able to see the big rock unloaded, LOL.

What's funny is they had zero interest haha. There was a crane truck at my inlaws unloading a 3/4 ton stone and they didn't care about it at all. They usually love seeing heavy machinery.

I really want to get my TIG skills dialed in. It's really cool having the adjustability to be able to weld with no fill while also being able to adjust amperage with your foot. I was able to go back over some caterpillar MIG welds that I did and flatten them out no fill with the TIG. Pretty cool machine. 

1976 Trans Am LS1 and much more...SOLD
1968 Camaro LSA, T56 Magnum, and much more...SOLD

Current Project: 1955 Nomad LC9, 4L80e, C5 brakes and etc...

kentucky yeti

  • Jedi Council
  • Oracle Forum Member
  • *
  • Posts: 13363
  • located in western Ky
Re: Madaguy 1955 Nomad Build
« Reply #92 on: May 31, 2023, 10:00:41 AM »
750 Deere with 36” pads, skid steer and an excavator all in my yard now.  That enough heavy equipment for them lol?
Mike (aka Yeti)

1977 Y82 W72 Auto
2015 F-150 Lariat 4x4 (twin turbo)
2016 Explorer Limited
2012 Mustang

ryeguy2006a

  • Oracle Forum Member
  • *
  • Posts: 6040
Re: Madaguy 1955 Nomad Build
« Reply #93 on: May 31, 2023, 12:20:17 PM »
That's perfect Mike! My neighbor in NY was that way all the time. I swear he had every piece of equipment you could ever need.

1976 Trans Am LS1 and much more...SOLD
1968 Camaro LSA, T56 Magnum, and much more...SOLD

Current Project: 1955 Nomad LC9, 4L80e, C5 brakes and etc...

ryeguy2006a

  • Oracle Forum Member
  • *
  • Posts: 6040
Re: Madaguy 1955 Nomad Build
« Reply #94 on: June 12, 2023, 08:54:47 AM »
I feel like this weekend I made a huge step forward with the metal work. I've been working diligently this week and Sunday I was able to sit back and enjoy my work. Earlier in the week, I had a grinding session to finally knock down the welds on the inside and bottom side of the rear floor pans. I hate grinding on my back under a car... I've tried in the past to grind my butt welds flush with the panels, but for whatever reason I usually end up doing more harm than it's worth. So I just knocked them down because at the end of the day it's going to be covered in carpet. I spent more time on the bottom side since that will be more likely to be seen. 


All patched up and ready to move onto the next step. I'm leaving that for now as I want to coat it with POR15. 


The wheel well is now mocked up for a final time and all surfaces have been sprayed with weld through primer. It was time to figure out the rear patchwork that is needed to modify a wagon wheel tub to fit a Nomad. Unfortunately the Nomad wheel tubs are not reproduced, so it's necessary to modify a wagon wheel tub to fit. I bought these a while ago, but the rear side panels that fit on either side of the spare tire well needed to be fit up. What I did was put a straight edge on them off of the car and marked where they were straight so that I could have a nice straight wheel tub. 


I had to notch the panels on the end so that they sat on top of the rear brace. 


Now that those panels are where they need to be, I can build off of that plane. I know that the wheel wells will be covered with something eventually, but it was important to me to get them as good as I could. Now I can test if the panels I made in the metal brake. 


Next was getting an initial piece cut and mocked up to fill the hole. 


Trimmed everything down closer and tighter to where they need to be. 


There wasn't much to take pictures of, but it took a lot of time fitting and playing with the panels so that they were level, straight and fit on the same plane. My spot welds would sometimes shrink the metal too much and I had to cut and repeat the process. I was happy with the fitment and decided to finally spot weld the wheel well into the body. I still need to remove the cargo panel, drill spot weld holes and spray with weld through primer, so I stopped welding at the rear floor pan. 


Now it's really starting to look like something. I slowly worked my way around the panels to keep the heat down and make sure that the panels weren't moving when I was welding. If they move off of the same plane from one another it will be very obvious. Once I worked my way around, I ground the welds down a little so that I could see the panel better and get a feel for the shape. 


Again, I skipped around didn't get any picture of the in between process, but I worked my way around and filled the gaps in. Kept my heat spaced out and kept feeling the panel with my bare hands. Even doing this, the panel moved around, but I kept experimenting as I was going. I would get a little tin canning, and would try to add more heat to the side that looked like it needed to be shrunk. I was surprised that it worked to significantly reduced the tin canning it had at one point. Also kept my grinding wheel moving. I used a 36 grit flap disk for the first pass and stayed moving. I read an article that sometimes it's actually the grinding after the welding that can cause the panels to warp. Then I swapped to a 120 grit flap disk and tried to smooth off the panel without taking off too much of the original panels and thinning them out. I coated all the bare metal in an etch primer followed by a few coats of satin black. I'm very pleased with how it all turned out, although the satin is more glossy than I was hoping for. May hit it with a flat black. 


This took way longer than I had initially thought, due to some surprise previous repairs that needed to be redone, but I'm happy with the results. I'm hoping that the second side is going to go much faster since it is in better shape than the driver's side. Once I'm done with the inner wheel wells, I'm moving towards installing the outer wheel wells. 

Cheers,
​​​​​​​Ryan

1976 Trans Am LS1 and much more...SOLD
1968 Camaro LSA, T56 Magnum, and much more...SOLD

Current Project: 1955 Nomad LC9, 4L80e, C5 brakes and etc...

Re: Madaguy 1955 Nomad Build
« Reply #94 on: June 12, 2023, 08:54:47 AM »

kentucky yeti

  • Jedi Council
  • Oracle Forum Member
  • *
  • Posts: 13363
  • located in western Ky
Re: Madaguy 1955 Nomad Build
« Reply #95 on: June 12, 2023, 10:01:32 AM »
That is coming together nicely.  Truthfully, we expect no less from you; and you didn't disappoint us in the least.
Mike (aka Yeti)

1977 Y82 W72 Auto
2015 F-150 Lariat 4x4 (twin turbo)
2016 Explorer Limited
2012 Mustang

5th T/A

  • Oracle Forum Member
  • *
  • Posts: 1394
Re: Madaguy 1955 Nomad Build
« Reply #96 on: June 12, 2023, 01:09:00 PM »
I don't know what else to say, I am impressed. This Nomad was fortunate to fall into your hands.
1980 T/A with a Pontiac 461

Gone but not forgotten;
1973 T/A 455
1975 T/A 400
1978 T/A W72
1982 T/A cross fire injected

Two wheel toys;
2014 Harley Ultra Classic Limited
2013 Honda CB1100
2010 Yamaha Vmax
1982 Yamaha Seca 750

ryeguy2006a

  • Oracle Forum Member
  • *
  • Posts: 6040
Re: Madaguy 1955 Nomad Build
« Reply #97 on: June 13, 2023, 06:26:36 AM »
Thanks guys! I'm highly motivated to get the metal work done on this car.

1976 Trans Am LS1 and much more...SOLD
1968 Camaro LSA, T56 Magnum, and much more...SOLD

Current Project: 1955 Nomad LC9, 4L80e, C5 brakes and etc...

FormTA

  • Oracle Forum Member
  • *
  • Posts: 5574
  • Life is short, have fun, Drive a T/A
Re: Madaguy 1955 Nomad Build
« Reply #98 on: June 13, 2023, 11:22:05 AM »
Looking really good Ryan! I enjoy metal work and you're doing a fantastic job. Not much I could suggest that would make it better. You're going to have a solid ride when done to sell..... :D Just kidding (because he always sells his awesome creations).
79 Trans am low buck LS swapped
79 Formula 301 (Work in progress)
67 RS Camaro (waiting it's turn)
69 Dodge charger on late model charger chassis
49 Ford F1 on a 2003 Chevy ZR2 Chassis (current project)
Names, Luke. If I hear anyone telling me they're my father....

ryeguy2006a

  • Oracle Forum Member
  • *
  • Posts: 6040
Re: Madaguy 1955 Nomad Build
« Reply #99 on: June 14, 2023, 06:38:08 AM »
Looking really good Ryan! I enjoy metal work and you're doing a fantastic job. Not much I could suggest that would make it better. You're going to have a solid ride when done to sell..... :D Just kidding (because he always sells his awesome creations).

Haha, that's not that far off Luke.

1976 Trans Am LS1 and much more...SOLD
1968 Camaro LSA, T56 Magnum, and much more...SOLD

Current Project: 1955 Nomad LC9, 4L80e, C5 brakes and etc...

ryeguy2006a

  • Oracle Forum Member
  • *
  • Posts: 6040
Re: Madaguy 1955 Nomad Build
« Reply #100 on: June 20, 2023, 08:23:48 AM »
After a huge push to get that driver's side wheel well in place. I've been slowly just planning my next step to make sure that I'm not missing anything I'll regret after welding up the panels. Before I welded in the outer wheel house panels, I wanted to make sure that I prepped all the inner structure panels while I had access to them. I also wanted to get the metal under the trim treated to hopefully prevent the panels from getting any worse. I used an oil based paint that is similar to POR-15, but I think was made by Rustoleum. 


Now that this channel is repaired and prepped, I can work on reinstalling the glass and trim. I left that piece turquoise to remember the original color since the trim tag is missing on this car.  


Next was prepping the original outer wheel houses. They required a few patches and adding on the Nomad lower panels. They were ready for me to install new seals which I chose to both glue and rivet. While not original, they worked really well and should seal very nicely to the quarter panels. The rear outer wheel house is shown, but I added a seal for the front outer as well. 


One last test fit before I do a final weld up. Very happy with the fitment, and it will sit nice and flush with the front outer as well. Now I can pull them both, paint the top sides and final weld them in. 


I'm not sure what this piece is called, but it's got a rubber bumper that stops the rear sliding glass. I re-created this little bracket and will get this installed after I get the window felts back in place. Original was in terrible condition, but I was able to get a good trace of it before it broke in half. 


I started preparing the passenger side wheel house for installation. I got it all of the old under coating off of it, but still need to drill all my spot weld holes and grind down the flange where I'll need to weld on the body smooth. Hopefully I'll make a bunch more progress on that this week. Once I get both wheel wells installed, I can test fit my rear folding seat. I can't wait for that because I think that is one of the coolest parts of these old wagons. 

Cheers,
​​​​​​​Ryan

1976 Trans Am LS1 and much more...SOLD
1968 Camaro LSA, T56 Magnum, and much more...SOLD

Current Project: 1955 Nomad LC9, 4L80e, C5 brakes and etc...

ryeguy2006a

  • Oracle Forum Member
  • *
  • Posts: 6040
Re: Madaguy 1955 Nomad Build
« Reply #101 on: July 05, 2023, 07:36:28 AM »
Really happy with the progress that I've made over the last few weeks. My big push really paid off. I left off with doing a last final test fit of the inner wheel house. I've had it on and off quite a few times, so I knew it was ready to go, but this time it was all prepped with weld through primer.


Then I started to mock up the other pieces that needed to be trimmed and fit up to complete the patches. The first picture shows the difference between the angles of the Nomad vs all other wagons. The wheel wells are unique and need to be modified since no one makes reproduction pieces.


Once I was happy with the initial trial fitment, I just started trimming the pieces to get them to come together the way I wanted. I kept a close eye on the driver's side to be sure they matched. Since I was splicing pieces the top piece wanted to dip down, so I kept my straight edge and made sure it was straight and level across the top.


The fitment is really good at this point with all of the panels. I have been holding off on welding in the center cargo panel until I got the passenger side all mocked up. It was time now to work my way down and start filling in the spot welds.


Once the cargo panel was done, I moved onto the wheel well.


I skipped a lot of steps here, but over 3-4 days I worked my way around and welded in the upper patch panel. It was a little more tricky than the driver's side, but nothing too crazy. But I forgot to take any pictures during that time, so here's the finished wheel well. The repairs are very visible, but that was done on purpose because they are going to be covered, so I didn't take the time to make it perfectly smooth.


So stoked to be to this point now. Lots more work than I had originally anticipated, but I'm very pleased with the results.


After I finished up that wheel well I decided to pull out my engine and start looking at that. I've been telling myself that I had to wait to do anything other than sheet metal work until I was done. Well I'm pretty much done now with the rear of the car now, so I'm going to get things ready. I got the boys out early and they helped me power wash the 6.0 block after I got it stripped down to the bare block.


It cleaned up really nicely and all the bearings looked great.


Then yesterday I got curious what the spare tire well would look like. It needs a little repair where the spot welds were drilled out, but I sprayed it black and set it in place. I've been going back and forth on what to do with that area. Delete the spare tire and run a larger fuel tank, or run a wagon tank and keep the spare. Now that I see it in place, I'm confident that I want to keep the spare tire and modify the wagon tank for an in-tank pump.


I'm hoping that things will start to move a little quicker now that all of the heavy fabrication work is done. I still need to install the outer wheel houses on both sides, but they will move quickly since they are just spot welded in place. I'm also going to start plugging away at things like brakes and components to mock up the engine/transmission.

Cheers,
Ryan

1976 Trans Am LS1 and much more...SOLD
1968 Camaro LSA, T56 Magnum, and much more...SOLD

Current Project: 1955 Nomad LC9, 4L80e, C5 brakes and etc...

5th T/A

  • Oracle Forum Member
  • *
  • Posts: 1394
Re: Madaguy 1955 Nomad Build
« Reply #102 on: July 05, 2023, 08:03:06 AM »
Ryan, did you have any idea how involved this project would be? I can’t comprehend such an undertaking. Looks fantastic and I am glad you decided to keep the spare tire well.
1980 T/A with a Pontiac 461

Gone but not forgotten;
1973 T/A 455
1975 T/A 400
1978 T/A W72
1982 T/A cross fire injected

Two wheel toys;
2014 Harley Ultra Classic Limited
2013 Honda CB1100
2010 Yamaha Vmax
1982 Yamaha Seca 750

FormTA

  • Oracle Forum Member
  • *
  • Posts: 5574
  • Life is short, have fun, Drive a T/A
Re: Madaguy 1955 Nomad Build
« Reply #103 on: July 05, 2023, 11:37:48 AM »
I like the speed of your progress.  Spare tire well is a great place for a sub or amplifier.   :-D

Ah going 6.0.... I can't remember, you putting boost on it or just efi?

Great progress as usual man. I just don't have time in the summer to work on much. We take off to the lake every weekend so once fall hits hopefully I can get back on the 49 F1 or maybe finally paint my front flares and spoiler and get them on...

Nice update!
79 Trans am low buck LS swapped
79 Formula 301 (Work in progress)
67 RS Camaro (waiting it's turn)
69 Dodge charger on late model charger chassis
49 Ford F1 on a 2003 Chevy ZR2 Chassis (current project)
Names, Luke. If I hear anyone telling me they're my father....

ryeguy2006a

  • Oracle Forum Member
  • *
  • Posts: 6040
Re: Madaguy 1955 Nomad Build
« Reply #104 on: July 05, 2023, 11:59:51 AM »
Ryan, did you have any idea how involved this project would be? I can’t comprehend such an undertaking. Looks fantastic and I am glad you decided to keep the spare tire well.

I knew that there was going to be a lot of work to swap the pro-street wheel tubs back to stock, but what I didn't anticipate is the amount of rust and bad repairs that were deliberately covered up. :?

I appreciate the compliments!

Luke, I'm just super motivated to get this car back on the road. I've tried to forget about my Camaro and just stay focused on my Nomad. I really miss driving an old car around to shows and now that we're down south there are so many more opportunities to get them out. Hoping that by late summer I'll have the car running/driving again. I've already got my license plates and insurance so it's just an inspection away from being road legal.

1976 Trans Am LS1 and much more...SOLD
1968 Camaro LSA, T56 Magnum, and much more...SOLD

Current Project: 1955 Nomad LC9, 4L80e, C5 brakes and etc...

Re: Madaguy 1955 Nomad Build
« Reply #104 on: July 05, 2023, 11:59:51 AM »

jonathonar89

  • Oracle Forum Member
  • *
  • Posts: 2508
    • Mark's Cars Inc.
Re: Madaguy 1955 Nomad Build
« Reply #105 on: July 05, 2023, 09:27:09 PM »
Doing it like a pro.  Can’t wait to see the build finish.
Mark's Cars Inc.

https://markscarsinc.com

ryeguy2006a

  • Oracle Forum Member
  • *
  • Posts: 6040
Re: Madaguy 1955 Nomad Build
« Reply #106 on: July 10, 2023, 09:17:14 AM »
Thanks man!

Didn't make a whole lot of progress this weekend, but moving forward none the less. I'd been on the fence about building the LS2 block, but at the end of the day I really wanted an aluminum gen4 5.3 engine. So I posted it for a few days on FB marketplace that I wanted to trade the bare block for a LC9 or similar. Some guy messaged me and said that he had a good shortblock that he pulled out of his car to go with a forged 5.7 and kept this as a spare. He sent me a video of it running and he wanted to go with something larger than the 5.7, so we swapped. Very happy with the trade. I am planning to add a turbo at some point so I'll pull the pistons and gap the rings. Probably .024/.026, and then reassemble. I kept the 6.0 rotating assembly, so if I find a good deal on an iron block, I always have the option to put together a forged piston short block. For now I'm just going to push it in the corner and get back to finishing the metal work.


Here's the finished window bracket. I think the only function this serves is a stop for the sliding side window. The original one was completely rusted, so I remade this one.


I installed the new outer seals on the outer wheel houses and now that they are cured, I wanted to get them installed. I wasn't able to finish, but the driver's side is now mocked up and ready to weld. The passenger side rear outer wheel house still needs to have the seal installed, but should be able to get to that this week.


I got a little sidetracked by a treasure I found. I was cruising FB Marketplace and found where a guy was moving and had some stuff out by the curb for free. It was some sort of home brew setup that he had lost interest in and needed to get rid of it. I saw it and immediately thought that would work perfectly for the new welding cart that I have been wanting to build. I went to go check it out and grabbed it. It's made of a heavy square tubing and the dimensions are spot on for what I need. I'm going to modify the bars to shorten it, but I'll have more than enough materials to make exactly what I want. I removed all the brew stuff and I'm hoping to make a buck on it.


I started by adding some casters on the front to get it mobile, since it was never meant to move when brewing.


That's as far as I got, but the plan is to make a holder for two tanks at the rear, middle will have some TIG Filler rod holders, tool box somewhere on the bottom and then a platform on the top for holding the welder. I'll add some hooks and clips for my helmet, hoses and cables. Very excited to get rid of the cheapy Harbor Freight unit that is very top heavy.

Hoping to get all of the welding done soon on the body and then I'll be able to re-install the side windows and trim.

Thanks,
Ryan

1976 Trans Am LS1 and much more...SOLD
1968 Camaro LSA, T56 Magnum, and much more...SOLD

Current Project: 1955 Nomad LC9, 4L80e, C5 brakes and etc...

ryeguy2006a

  • Oracle Forum Member
  • *
  • Posts: 6040
Re: Madaguy 1955 Nomad Build
« Reply #107 on: July 17, 2023, 09:37:05 AM »
It doesn't look like it in the pictures, but this weekend I took a huge step forward with progress getting done. Picking up right where I left off with the driver's side outer wheel house panels mocked up, I got right to welding them solid. I took my time to get the panel to fit nice and flush against the inner wheel well. I had to use any combination of my floor jack, self tapping screws and me pressing with the end of a hammer to get the spot welds flush.


Once that was fully welded, I moved my attention to the passenger's side. I scuffed down and painted the inner structure to help prevent any future rust issues.


While I had the paint out, I also scuffed down and painted the rear floor pan section that I grafted in. Really glad to have this section done now.


I got busy, and didn't get any pictures, but I got the passenger side outer wheel houses mocked up and prepped for welding. Once I was happy with the fitment, I got everything fully welded.


Now that these are done, the wheel houses are completely finished! I'm stoked to have gotten to this point. Just need a little paint and then move onto the spare tire well. This should be pretty straightforward, so it should move pretty quickly.

I started to move my attention to the fuel tank that I picked up from the junkyard. I got it really cheap and I'm going to use this for now. It had a few pinholes in it, but they have been repaired and hold water. I'm going to make a fuel pump recess panel and weld in a USCAR fuel pump ring to use some sort of in tank pump. The tank had a lot of varnish that took some time to get cleaned out, but is going to work just fine for me. Not the ideal tank, but given that I'll be deleting the spare tire well and ditching this tank when I run a Nerd Rods frame this will be a perfect temporary solution for me.


My biggest dilemma for this project is what fuel pump to run. The fuel tank, with the 2" recess will land right around 10.5" tall. My plan was to run a 5th gen Camaro SS tank, convert to fixed pressure and extend the height because the max is 7". But I'm not sure that is going to be my best solution. It's a long way to extend the height.


I got sick of looking at the bubbling roofline, and finally took a grinder to it. I was pleasantly surprised with most of the roof. There were a few pinholes, but there must have just been some contamination when the roof was painted as most of it wasn't rusty.


But then I found some bad at the rear corner... Thankfully the other side looks to be just some thing in the paint and I'll recoat it and try to paint match the best I can. I found out that a mid 70s to 92ish Chevy G vans have front fenders that at the top have the exact same curvature as the rear of the wagons. So I'll track one down and use it as a donor. Should be a pretty quick patch and then I can get the roof back in shape.


I'm going to be ordering some parts this week so I can get the rear seat mocked up as well as the engine and transmission. Will also try to work more on the spare tire well and possibly wrap up the rear cargo area.

Cheers,
Ryan

1976 Trans Am LS1 and much more...SOLD
1968 Camaro LSA, T56 Magnum, and much more...SOLD

Current Project: 1955 Nomad LC9, 4L80e, C5 brakes and etc...

ryeguy2006a

  • Oracle Forum Member
  • *
  • Posts: 6040
Re: Madaguy 1955 Nomad Build
« Reply #108 on: July 24, 2023, 07:50:08 AM »
Progress slowed this week. I made a big push to get the wheel wells completely welded up and got a little burned out. I sprayed some rattle can paint on wheel wells to give them a finished look. I'm really happy with the end results. I'm going to spray some bedliner in there at some point, but wanted to look at the wheel wells in one color. 


That's all the work I've done on the body. I've been continuing the parts search since hunting for parts is always something that I enjoy. I've been keeping an eye out for a seat in decent shape that wasn't ridiculously priced and was able to finally track one done. I was finding rusty seat frames and people were asking $800 bucks! I ended up driving a little farther than I wanted, but the seat is overall in great shape and not rusty at all. Bonus is it's complete with the tracks and side shells. There are some obvious tears in the seat bottoms, but they sorta match the vibe of the car so they will work as is for now. Looks like someone put the cover right over the original seat covers. Not sure if it's right or wrong, but they appear to have done a decent job. 


I couldn't wait to see what it felt like in the car so I installed it first thing when I got back. It fit like a glove in the car just like it should, and felt really good since I haven't really sat in the car since I bought it. I'm a taller guy, so I may need to eventually find some shorter seat tracks to lower the seat down some, but it feels great to finally have a seat. 


Like I always do, I asked the guy that I bought the seat from if he had any other parts, and he happened to have a set of new shocks that he installed but never used. He sold them to me cheap, which is great since I don't plan to keep this frame long. He also had a 57 wagon fuel tank, which was in way better shape than the one I was planning to use, and he gave me a great bundle package on everything. 


I also placed an order last week for some parts I need to get the motor mocked up, and the rear seat latches to get the rear seat mocked up. I also found a great deal on a new fuel pump that will fit the height of the wagon fuel tank. It's a new Delphi unit made for 09-13 Silverado's. 


I couldn't wait to see what the rear seat looked like in the car so I quickly installed the rear seat latches and loosely installed the seats. I have the lower seat brackets just sitting on floor propping up the seat bottom for right now, but for just loosely mocking it up, everything fits great. 


It's interesting how bolting a few seats in came make the car feel so much more complete. I'm getting so excited to get this car back on the road. I've got a line on a pair of G20 Chevy Van fenders to make the repairs on the rear roof, and the 55-57 engine mounts from CPP should be delivered today. I can't wait to get the engine mocked up and see what, if any, modifications I'll need to make to get it all to fit properly. 

Cheers,
​​​​​​​Ryan

1976 Trans Am LS1 and much more...SOLD
1968 Camaro LSA, T56 Magnum, and much more...SOLD

Current Project: 1955 Nomad LC9, 4L80e, C5 brakes and etc...

FormTA

  • Oracle Forum Member
  • *
  • Posts: 5574
  • Life is short, have fun, Drive a T/A
Re: Madaguy 1955 Nomad Build
« Reply #109 on: July 24, 2023, 11:21:50 AM »
Grat progress!! You should have asked. I think I have those motor plates laying around somewhere and I don't plan on using them. At least I think I still have them.... I ended up using Dirty Dingo mounts as they were really adjustable and I had no idea what I was doing when I LS swapped my car.
79 Trans am low buck LS swapped
79 Formula 301 (Work in progress)
67 RS Camaro (waiting it's turn)
69 Dodge charger on late model charger chassis
49 Ford F1 on a 2003 Chevy ZR2 Chassis (current project)
Names, Luke. If I hear anyone telling me they're my father....

5th T/A

  • Oracle Forum Member
  • *
  • Posts: 1394
Re: Madaguy 1955 Nomad Build
« Reply #110 on: July 25, 2023, 10:04:03 AM »
Ryan, I have to chuckle when you say progress slowed! I am retired and have done very little to my car this year. By my standards you are moving at the speed of light.
1980 T/A with a Pontiac 461

Gone but not forgotten;
1973 T/A 455
1975 T/A 400
1978 T/A W72
1982 T/A cross fire injected

Two wheel toys;
2014 Harley Ultra Classic Limited
2013 Honda CB1100
2010 Yamaha Vmax
1982 Yamaha Seca 750

jonathonar89

  • Oracle Forum Member
  • *
  • Posts: 2508
    • Mark's Cars Inc.
Re: Madaguy 1955 Nomad Build
« Reply #111 on: July 25, 2023, 10:21:52 PM »
Keep on going brother! 
Mark's Cars Inc.

https://markscarsinc.com

ryeguy2006a

  • Oracle Forum Member
  • *
  • Posts: 6040
Re: Madaguy 1955 Nomad Build
« Reply #112 on: July 26, 2023, 09:20:25 AM »
Thanks guys!

Luke, no worries. What other swap parts do you have though? I may be interested.

I've got a time line in my mind, so if I'm going to meet that timeline I need to be constantly moving. So in my mind I'm slowing down, but to put things into perspective I am moving along quickly on this project. In the 8 months I've owned the car, I cut out and completely replaced the rear floor and cargo sections. Not too bad, because the first 2 months I was collecting parts.

My goal is to have the car on the road running/driving by the end of September. We'll see if I can make my goal.

1976 Trans Am LS1 and much more...SOLD
1968 Camaro LSA, T56 Magnum, and much more...SOLD

Current Project: 1955 Nomad LC9, 4L80e, C5 brakes and etc...

kentucky yeti

  • Jedi Council
  • Oracle Forum Member
  • *
  • Posts: 13363
  • located in western Ky
Re: Madaguy 1955 Nomad Build
« Reply #113 on: July 27, 2023, 06:39:57 AM »
Ryan, I have to chuckle when you say progress slowed! I am retired and have done very little to my car this year. By my standards you are moving at the speed of light.

What he said!
Mike (aka Yeti)

1977 Y82 W72 Auto
2015 F-150 Lariat 4x4 (twin turbo)
2016 Explorer Limited
2012 Mustang

ryeguy2006a

  • Oracle Forum Member
  • *
  • Posts: 6040
Re: Madaguy 1955 Nomad Build
« Reply #114 on: July 31, 2023, 08:48:41 AM »
I received my CPP engine mounts in the middle of last week and was dying to get the engine together for a test fit. The kit I bought came with the typical side mount SBC rubber engine mounts and I bought the set of SBC LS adapter plates to bolt it all together. Unfortunately, Holley doesn't make a kit like they did for my 1968 Camaro, so after a bunch of research, this setup seemed like the most common setup to work with the existing headers and pans.


Step one for these engine mounts is to drill out two rivets on each side of the frame in order to bolt on these conversion mounts. Back in 55-57, they used a front mounted engine mount with no side mounted provisions. These mounts were adapted a long time ago when people wanted to swap newer SBC/BBC's into the cars for more performance.


I had to enlarge the holes slightly to 3/8" to be able to bolt up the mounts. I wanted to test fit the engine first, before I drilled the top holes. Once the final engine placement is confirmed to be good, I'll drill 2 holes from the top and bolt them down final. I may put a few welds on them as well for good measure.


First step in the mock up phase was putting the pan I'm planning to run on the engine. I bolted it down with 4 bolts since it's just mock up. I got this pan for free from someone who was trying to get tie rod clearance on his application. I'll weld in some plates if this fits my application. If not, I'll keep it for another project.


Flipped it around and got the engine off of the stand. Ready to get it bolted to the 4L80e. No flexplate because again, just mock up.


Mated up the engine and trans and it went great. Just had to track down some bolts. I'll get all new bolts when I am ready for final installation.


Wow, that trans is heavy! It was quite the task to lift the trans high enough to get over the grill. I had to lift it manually and spin it over the grill. I couldn't lift it any higher because the boom was hitting the hood. I also had to move the trans crossmember back about 10" from the Turbo350 position it was in. It's an aftermarket crossmember so that was a big plus. Here it was with the trans crossmember roughly on the mount, and the engine roughly in place. Unfortunately, there's an issue with the oil pan fitment...


I thought that it would be close with the fitment of that pan, but looks like I won't have enough adjustability to move it to any closer to the firewall. So, looks like I'll be needing a new pan.


So with that information, I decided to pull the oil pan and continue with the mockup. Once the pan was out of the way, I was able to get the engine down into the engine stands and set to 3.8* down. Lots of clearance with the trans, and should bolt up to the trans crossmember. For now I'm propping it up with a jack stand.


Now that the engine is in essentially the final spot, I'm going to start bolting on the heads, intake and manifolds to see how it's all going to fit. Pretty excited for that.

Cheers,
Ryan

1976 Trans Am LS1 and much more...SOLD
1968 Camaro LSA, T56 Magnum, and much more...SOLD

Current Project: 1955 Nomad LC9, 4L80e, C5 brakes and etc...

ryeguy2006a

  • Oracle Forum Member
  • *
  • Posts: 6040
Re: Madaguy 1955 Nomad Build
« Reply #115 on: August 01, 2023, 09:39:18 AM »
Now that the engine is in place, I'm so excited to start bolting parts on for mock up. Went from a bare short block to a full engine pretty quickly. Everything will get a good cleaning before final install, but for now I can check fitments.


I really wanted to get the cylinder heads and intake on to check the height of the intake since it's a tall truck intake. Shut the hood and there's miles of clearance. Next big question mark was the exhaust manifolds that I had. I bought a TBSS intake from a junk yard over 6 years ago for my Camaro, but ended up with a pair of shorty headers. Glad I hung onto this because it's a perfect fit! Not sure if the heat shield will fit too, but without it there's tons of clearance. Huge win!


Passenger side wasn't really a concern as most of the time with LS swaps there's a bunch of clearance here. This was no exception and I think the stock truck flanges will bolt up and work perfectly as well.


Then one other thing that was a question mark was the stock electric wiper motor. I was stoked that it fit without any issues and will have tons of clearance as well. The bump in the intake allows it to perfectly clear. I'm very happy that everything is fitting together so nicely.


Lots of pictures for not a whole lot of work, but thought it was worth an update. I'm starting to get distracted by the mechanical work as that is more fun to me than the metal work. I need to finish up the rear seat install and weld the seat brackets to the floor. Right now they are just sitting in place, but I need to center them and spot weld in their final places.

Cheers,
Ryan
« Last Edit: August 01, 2023, 09:41:13 AM by ryeguy2006a »

1976 Trans Am LS1 and much more...SOLD
1968 Camaro LSA, T56 Magnum, and much more...SOLD

Current Project: 1955 Nomad LC9, 4L80e, C5 brakes and etc...

roadking77

  • Oracle Forum Member
  • *
  • Posts: 13245
Re: Madaguy 1955 Nomad Build
« Reply #116 on: August 01, 2023, 12:55:54 PM »
How about heading north a day or two early and putting some shop time into my TATA! My poor motor is languishing in procrastination jail :shock:
Finished!
77 T/A - I will Call this one DONE!
79 TATA 4sp-Next Project?
79 TATA - Lost to Fire!
86 Grand Prix - Sold
85 T/A - Sold
85 Fiero - Sold
82 Firebird - Sold
'38-CZ 250
'39-BSA Gold Star
'49-Triumph 350
'52-Ariel Red Hunter
'66-BSA Lightning
'01-HD RoadKing

kentucky yeti

  • Jedi Council
  • Oracle Forum Member
  • *
  • Posts: 13363
  • located in western Ky
Re: Madaguy 1955 Nomad Build
« Reply #117 on: August 03, 2023, 06:56:34 AM »
Look at all that room under the hood!
Mike (aka Yeti)

1977 Y82 W72 Auto
2015 F-150 Lariat 4x4 (twin turbo)
2016 Explorer Limited
2012 Mustang

ryeguy2006a

  • Oracle Forum Member
  • *
  • Posts: 6040
Re: Madaguy 1955 Nomad Build
« Reply #118 on: August 03, 2023, 11:03:05 AM »
How about heading north a day or two early and putting some shop time into my TATA! My poor motor is languishing in procrastination jail :shock:

I'm heading north to give you another engine haha

Look at all that room under the hood!

Lots of room for a little hair drier!  :cool:

1976 Trans Am LS1 and much more...SOLD
1968 Camaro LSA, T56 Magnum, and much more...SOLD

Current Project: 1955 Nomad LC9, 4L80e, C5 brakes and etc...

wheels78ta

  • Active Forum Member
  • *
  • Posts: 319
Re: Madaguy 1955 Nomad Build
« Reply #119 on: August 04, 2023, 03:27:58 PM »
Thought you might like this

Willie

1978 Gold Y88 4 spd W72 WS6 project
1987 K5 Blazer---The Crawler
2006 Chevy Silverado Z71----Hers
2005 Chevy Suburban 2500---The Hauler

Re: Madaguy 1955 Nomad Build
« Reply #119 on: August 04, 2023, 03:27:58 PM »
You can help support TAC!